| Top Fuselage Log |
|
|
| ||||||
|
Home Project News February 3, 2021 Project Log Empennage Horizontal Stabilizer Vertical Stabilizer Rudder Elevators Rudder II Wing Kit Wings Fuel Tanks Ailerons Flaps Fuselage Kit Bulkheads Aft Section Foreward Section Top Fuselage Cabin Finish Canopy Cowling Electrical Firewall Forward Fuel System Engine Baffles Misc Miscellaneous Fiberglass Assembly Panel Finishing Up! FAQ Project Notes Project Summary Guestbook Other Stuff | Had to re-level the plane since my little 2x4 clamped to the tail idea won't work because I need to install the aft deck back there. :-( Anyway I just used the false spar stand to level the plane with nothing more than a sawhorse on the back. I also went ahead and riveted the aft side skins to the longerons up to where the top skins will go. Trimmed the F-757 gussets and dug out the seat belt anchors and other gussets from storage.
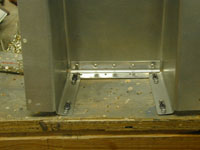
Drilled the little angles to the F-710 and F-711 bulkheads. Fabricated the spacer and the forward elevator stop that goes under the aft deck and got the aft deck clamped onto the fuse.
Drilled the aft deck to the longerons and bulkheads
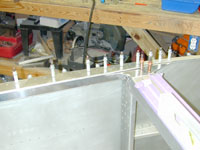
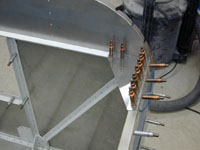
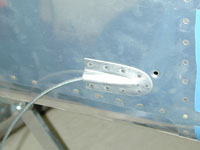
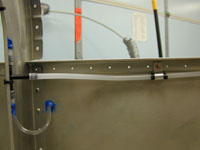
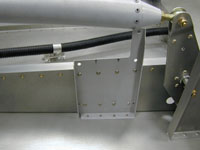
Drilled the shoulder harness anchors to the longerons. Drilled the forward firewall gussets to the firewall and longerons. Installed the corrugated nylon tubing in the fusealge as a wire run. Installed the rudder cables and drilled the little Avery rudder cable fairings to the side skin. Finished up the bellcrank support rib and fabricated the little tubing spacers for bellcrank. Finished the stringers for the top fuselage. Started fitting the top skins and drilled the little gussets to the F-706 and F-707 bulkheads.
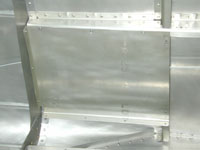
Drilled the top skins to the Fuselage.
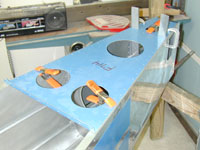
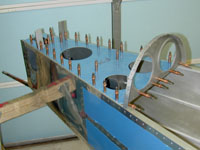
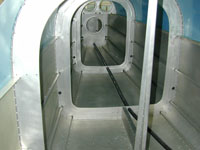
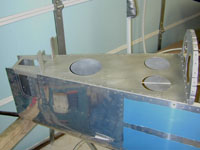
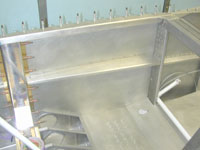
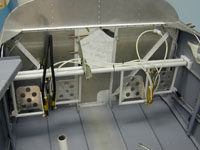
Started getting some of the baggage compartment walls ready to install. Installed another support under the baggage compartment for my fuselage wiring run. Rivted in the two side walls and the two floor skins of the baggage compartment. Started installing the rear baggage compartment bulkhead walls.
Still deburring and preparing parts for priming Deburred and dimpled the top fuselage skins. Finished preping and priming that pile of parts I've had around for months, and riveted together a seat back. Finished riveting the forward fuse gussets, installed the rudder cable fairings and started riveting on the aft deck.
Finished riveting the aft deck. Hung the canopy from the ceiling, finished the details on the baggage compartment bulkhead.
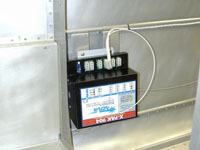
Got the wife to help me finish a few rivets that still needed to be done on the bottom of the fuse and piddled around with the flap mechanism a little more. Finished checking the electric aileron trim. Pressure tested the Pitot tubing in the left wing. Mounted the NOVA strobe power supply, and ran the shielded strobe wire down the rear of the fuselage to the tail. I also installed a small aluminum clip to hold the static line under the longeron.
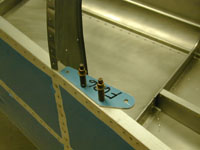
Installed the mount for the Tru-Trak pitch servo. I'm not buying the servo just yet but Tru-Trak gave me the mount so that I could put it in while it was still fairly easy to get to.
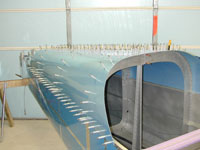
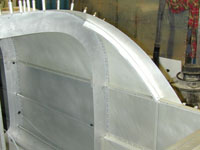
Countersunk the longerons where the aft canopy decks will rivet. Clecoed the forward fuselage structure together to make sure that everything would fit. I am trying to get what I need installed so that I can paint the inside of the cockpit. Trimmed the plastic from the rivet lines on the top fuselage skin. Installed the nutplates in the bulkhead for the emp fairing and started riveting the top fuse skins on. Did some more riveting of the top skins. Riveted the armrests in, and started riveting the aft canopy deck.
Did some more riveting on the top fuselage skins. Trimmed and fit the F-6111 L&R skin stiffeners.
Drilled the forward decks to the longerons and aft canopy decks. I cut the extra material off of the fuel tank selector box (where the manual trim knob would go). Made a little spacer to fill the gap that is left after cutting the extra material from the fuel selector plate. Started getting all of the parts of the cabin ready to prime. Shannon gave me a hand and we nearly finished getting the top skins on the fuselage.
Finished all the riveting on the top skins. Finished all the side skin to longeron rivets that I could. The ones where the top forward skin goes are still open. I started masking off all the places in the cabin were I don't want paint to go.
There were a few parts left that need to be riveted onto the fuselage that needed to be primed so I primed those. Then I finished masking off the rest of the cabin. Didn't feel much like working on the airplane but I did manage to get the bend in the top of the firewall.
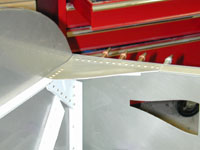
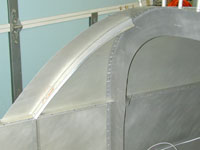
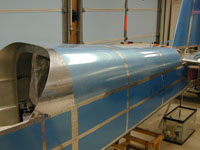
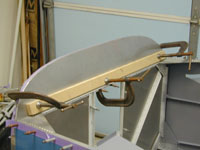
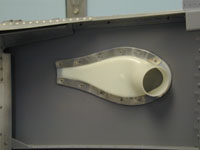
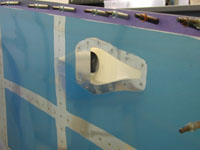
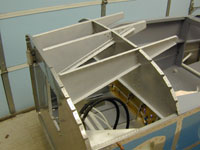
Fabricated four little funny looking strips of aluminum to back up the rivets on the NACA ducts. Finished installing the NACA ducts on the side of the fuselage. Started fabricating all the little parts for the forward top structure of the fuselage.
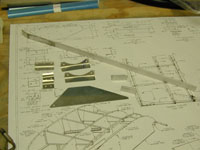
Still working on the top forward fuselage structure. I messed up a couple of parts so I have to send off for some more material. This is going slower than I thought that it would.
Worked on the forward fuselage structure some more. I drilled the holes for the center rib to firewall rivets and tweaked all the flanges to get them to line up a little better
Drilled some of the forward top skin holes. Finished fitting the panel into the forward fuselage, drilled the little angles that go around the forward canopy deck to fasten the panel and started fitting the eye-ball vents to the bottom of the panel. Finally finished fabricating all the parts for the top forward fuselage. Finished drilling all the holes and took it all apart, deburred, dimpled and countersunk all the holes and just nearly got it all ready to prime.
Deburred all the holes in the fuselage where the top forward structure will go. Re-installed (hopefully for the last time) the fuel vent lines. Played around with rudder pedal location until I was comfortable. Cleaned and primed all the parts of the forward fuselage structure.
Riveted all the structure together for the forward fuselage.
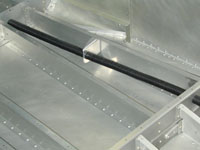
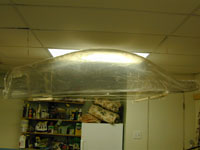
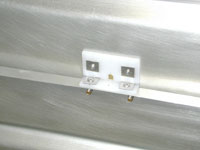
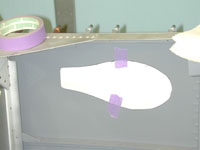
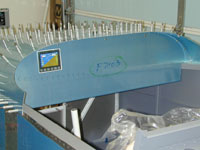
Dimpled the top forward skin and peeled the blue plastic off of it. That plastic is hard to get off after all these years. Riveted the small pieces that have the nutplates for the panel to the top fuselage skin. It really beat up the paint. I was kinda hoping this would look good but it doesn't. I guess I'll probably wind up putting some kind of upholstry on top of that thing. I also spent some time setting up the EIS engine monitor with ranges and setpoints, and customizing my aux inputs. I also tested the thermocouples with a heat gun to make sure that the proper cylinders read out in the proper place on the EIS. Coated the inside of the lower cowling with epoxy / acetone mix (50/50). Prepared the roll bar brace for installation. I had to pull a string through it for the canopy latch switch and I had to feed the compass light wires through it. Shannon came out and helped me rivet most of the top fuselage skin on. We didn't finish before she had to leave but we got enough of it done so that I could install the roll bar brace and wire up the compass light and canopy latch switch.
Shannon helped me finish the top fuselage skin. That's the last big piece of aluminum. It was a real pain. I'm glad that I made a point of leaving plenty of room to reach up from under the panel to get to those rivets. The map box really got in the way and I wound up having to put in one blind rivet.
|