| Fuel Tanks Log |
|
|
| ||||||
|
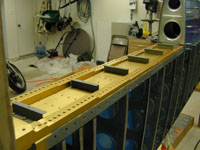
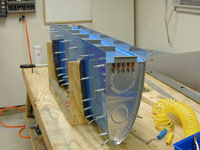
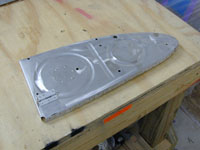
Home Project News February 3, 2021 Project Log Empennage Horizontal Stabilizer Vertical Stabilizer Rudder Elevators Rudder II Wing Kit Wings Fuel Tanks Ailerons Flaps Fuselage Kit Bulkheads Aft Section Foreward Section Top Fuselage Cabin Finish Canopy Cowling Electrical Firewall Forward Fuel System Engine Baffles Misc Miscellaneous Fiberglass Assembly Panel Finishing Up! FAQ Project Notes Project Summary Guestbook Other Stuff | There are two 21 gallon fuel tanks on the RV-7. They are the inboard leading edge of the wing. The tanks consist of a 0.032 skin and several ribs. The rear of the tank is sealed by a baffle. Attached to this baffle at each rib location are the brackets that hold the tank to the spar. The skin of the tank is attached to the main spar and the leading edge skin by countersunk screws and platenuts. The tank is sealed with a compound that is known as Pro-Seal. Started marking and drilling the fuel tank attach brackets. Still drilling and laying out the fuel tank attach brackets. Countersunk the rivet holes where the platenuts attach to the fuel tank attach brackets. Started deburring the fuel tank ribs. Deburring fuel tank ribs. Fluted all of the fuel tank ribs, and riveted the platenuts to the left tank attach brackets. Started bolting the attach brackets to the left main spar.
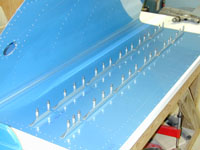
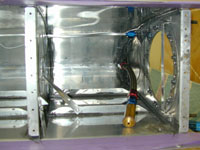
Lined up and drilled the T-702 baffle to the tank attach brackets and ribs. Mounted the skin on the tank assembly and drilled all of the holes in the tank skin. Drilled and clecoed the stiffeners to the fuel tank skin. Countersunk the holes where the skin attaches to the baffle.
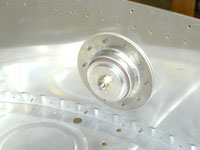
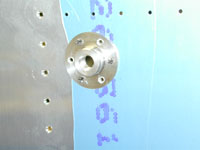
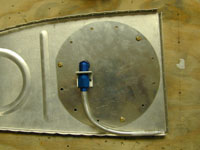
Fabricated the T-405 tank attach angle and cut out the T-410 reinforcement plates. Predrilled the cpacative fuel sender plates to the ribs and trimed the plates for the proper clearance. Drilled the access plate reinforcement plate to the inboard rib and drilled and clecoed the filler cap and drain flange to the tank skin. Started modifying the number two fuel tank rib for the inverted fuel pickup.
Finished the inverted tank mods to the second inboard rib. Countersunk the fuel filler body and deburred the skin and most of the ribs.
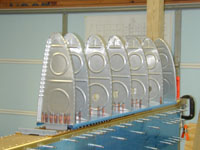
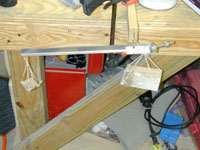
Finished deburring and dimpling the fuel tank ribs. Deburred the skin. Finished deburring and dimpling all the tank parts. Modified my leading edge craddle, and built a little 10:1 balance for measuring pro-seal.
Pro-Seal session #1. Riveted/sealed the tank stiffeners, the fuel filler cap and the tank drain flange. I also sealed the reinforcement ring that goes inside the inboard rib with the platenuts. (What a mess!)
Rebuilt the leading edge craddle and did some last minute preparation for the Pro-seal nightmare that is to begin tomorrow.
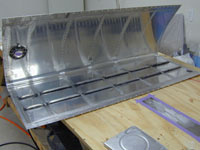
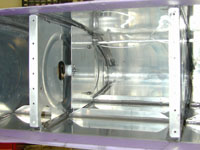
Pro-sealed all of the ribs into place in the fuel tank. Surely 1 hour per rib is a little much but that stuff was curing pretty fast and I had to mix up a batch for each rib. It's still hot in Houston. Installed and wired up the capacative fuel senders in the left tank. Installed the fuel vent and fuel pickup tubes and fittings as well as the little BNC connector for the fuel sender. Drilled, countersunk or dimpled the holes for the platenuts on the T-423 attach plate.
Finished closing the left fuel tank. Maybe I'll have time to forget how much I hate Pro-seal before I get to the right tank. Cleaned up the shop getting ready to go back to work on the wing.
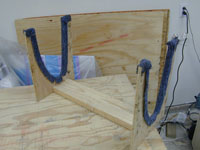
Pressure tested the fuel tank and fixed the big 'ol leak that I found.
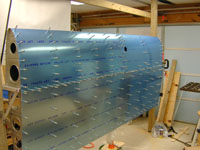
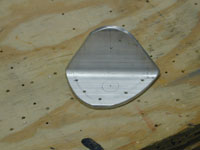
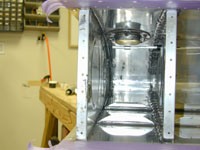
Finished leak testing the fuel tank. Decided that the leak was where my test fitting connected to the tank. Couldn't make a single 'Snoop' bubble anywhere else. Installed the tank on the wing. Fabricated the right tank attach brackets and drilled them to match the main spar. Finished the right tank attach brackets and bolted them to the spar. Cut out and deburred the tank stiffeners. Drilled the stiffeners to the right fuel tank skin and started getting the baffle lined up on the tank attach brackets. Drilled baffle to the attach brackets, drilled the skin to the ribs and the baffle. Prepared the capacitive fuel sender plates and drilled them to the proper ribs. Fabricated the tank attach angle (difficult with the bandsaw out of commission) Drilled the attach angle and doubler plates to the ribs. Drilled the fuel filler and drain to the skin. Cut the big hole in the inboard rib, fit and drilled the tank access reinforcement plate. Prepared the tank access plate for the fuel pickup and fabricated the anti-rotation bracket and drilled it to the tank attach plate. Fabricated the fuel pickup tube. Also made the little cover to fit over the tooling hole in the outboard rib. Started deburring and dimpling all the parts of the right tank.
Deburring and dimpling right fuel tank parts. Finished dimpling and deburring all of the right tank parts. Now I am ready for the Pro-seal. Sealed and back riveted all the right tank stiffeners, fuel tank filler, drain flange and six of the seven ribs. It goes faster the second time and it helps that it wasn't so hot this time so the Pro Seal cures slower. Installed the capacative senders in the right tank. Also cut and flared the the vent line. These things are much easier with the inboard rib off. Finished the capacative fuel sender installation, installed the inboard rib with the reinforcing ring and installed both of the reinforcement plates and the attach angle to the leading edges. Installed the baffle in the right tank. TANKS ARE FINISHED!!!! Now if it will just not leak then I can be done with Pro-seal. Pressure tested the right fuel tank, and cleaned up the shop a bit. Put the nutplates on the tanks where the fuselage fairing connects.
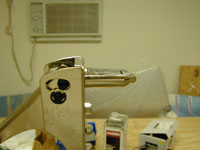
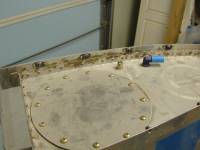
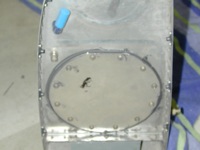
I decided that I didn't like the cork gaskets, so I took the access covers off and pro-sealed them in place instead.
I tested the fuel tanks and found a couple of leaks. The leaks weren't associated with the covers that I just re-did either. That doesn't give me a warm fuzzy feeling. I found one tiny leak in each tank so I did the ProSeal thinned with MEK trick, and pulled a small vacuum on the tanks and let this stuff wick into to the leak for a couple of hours and then put some unthinned ProSeal around that just for good measure. |