| Wings Log |
|
|
| ||||||
|
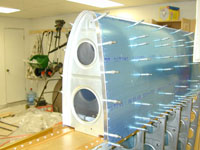
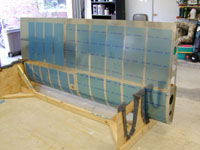
Home Project News February 3, 2021 Project Log Empennage Horizontal Stabilizer Vertical Stabilizer Rudder Elevators Rudder II Wing Kit Wings Fuel Tanks Ailerons Flaps Fuselage Kit Bulkheads Aft Section Foreward Section Top Fuselage Cabin Finish Canopy Cowling Electrical Firewall Forward Fuel System Engine Baffles Misc Miscellaneous Fiberglass Assembly Panel Finishing Up! FAQ Project Notes Project Summary Guestbook Other Stuff | The wings are fairly straight forward although somewhat tedious. They consist of two spars. A main spar that is pre-assembled and a smaller rear spar that must be assembled by the builder. There are several main ribs that install between the main and rear spar and these are covered with four skins, two top skins and two bottom skins. The leading edge of the wing is made up of an outboard leading edge assembly of ribs and a curved skin and the inboard leading edges are the 21 gal fuel tanks. Received the wing kit today. Shannon and I inventoried all the parts and I stored them away.
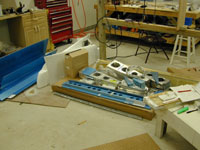
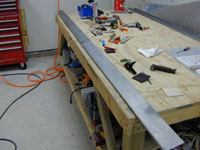
Cleaned up the garage and got the main wing spars out to get started on the wings.
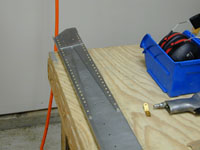
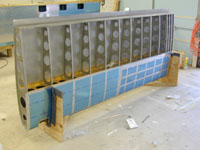
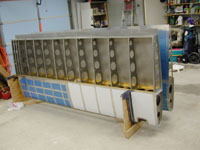
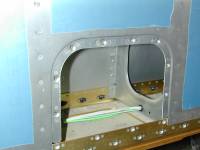
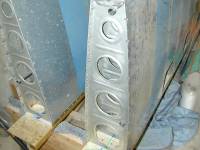
Drilled and countersunk all the holes for the tank skin attach platenuts. Started attaching the platenuts and countersinking the screw hole. Finished attaching the tank skin attach platenuts on the main wing spars.
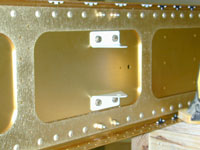
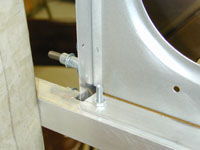
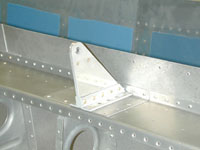
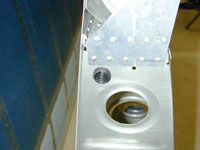
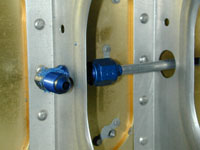
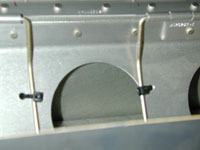
Attached all the platenuts for the wing inspection covers on the main wing spars. Fabricated the little spacers that go behind the tie downs and started working on drilling the tie downs to the wing spar. Finished the tie down assemblies on the main spars and started deburring the parts of the rear spars.
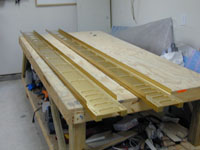
Deburring the parts of the rear wing spars Finished deburring the parts for both rear wing spars. Primed the spars and assembled them.
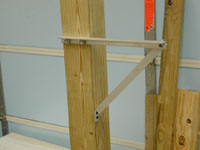
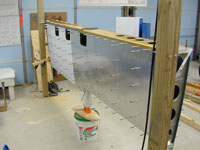
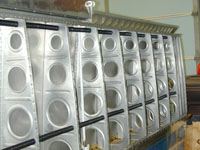
Deburring wing ribs Deburring wing ribs Deburring wing ribs Deburring wing ribs Deburring wing ribs Finished deburring wing ribs and started fluting / straightening wing ribs Fluting and straightening wing ribs Finished fluting and straightening the wing ribs. Modified the H-Jig for use in holding the wings. Clecoed the main ribs to the main and rear spars of the left wing.
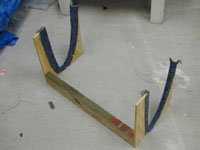
Drilled the ribs and spars of the left wing. Clecoed and drilled all the ribs and spars of the right wing and then deburred all the ribs and spars. Also started building the little wooden fuel tank craddle. Finished the leading edge / fuel tank craddle. Started drilling the holes in the main ribs for the electrical conduit
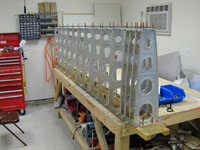
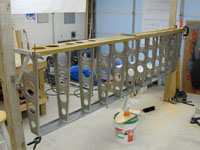
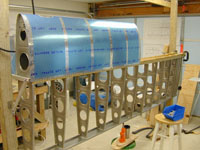
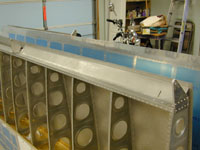
Finished drilling all the holes for the conduit. Deburred the holes in the left wing parts and prepared the left wing parts for priming. Primed the left wing ribs. Riveted the main ribs to the main and rear spars. Shannon built the wing storage craddle. Mounted the left wing skeleton in the stand. Clecoed and drilled all of the main skins. Clecoed the leading edge skin to the ribs and spar.
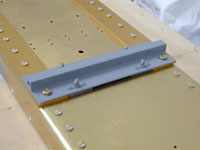
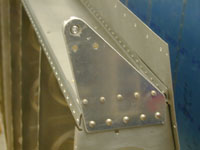
Installed the W-423 joint plate.
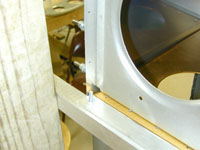
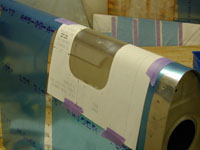
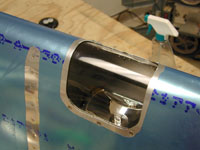
Drilled (I thought I already did that) deburred, and dimpled the leading edge skin. Deburring and dimpling wing skins and ribs. Deburring and dimpling wing skins and ribs. Primed the wing skins and countersunk most of the little holes in the wing spar. Finished countersinking the spar. Riveted the leading edge skin to the ribs and started installing the Duckworks landing light in the leading edge.
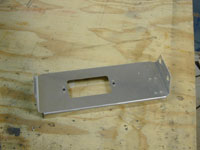
Got the mounting plate built and trimmed the plexi for the Duckworks light in the left wing.
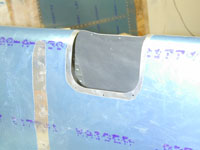
Finished the landing light installation in the left leading edge.
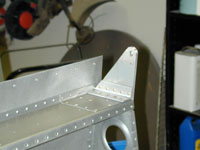
Tapped the tie down bracket and drilled the little hole in the skin for the tie down. Started riveting the leading edge assembly to the spar. Finished riveting the leading edge assembly to the left wing.
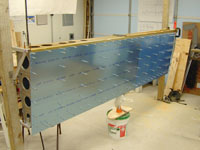
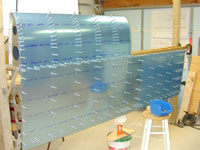
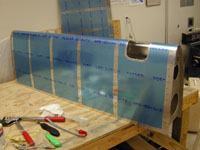
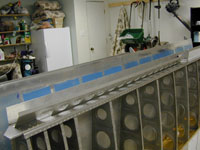
Started riveting on the top wing skins Still riveting top skins on Finished riveting the top skins and took the left wing out of the jig and into the craddle.
Installed the aileron bellcrank in the left wing. Cleaned up the shop and started preparing the ribs for the right wing for priming.
Primed all the right wing ribs. Assembled the right wing skeleton and hung it on the jig. Clecoed and drilled all of the main wing skins top and bottom as well as the leading edge skin. Time to start on the other tank. :-( Cleaned up a little bit and worked on the leading edge parts. Removed the top skins from the skeleton and deburred both of them as well as the leading edge skin. Riveted the platenuts to the tank attach plate. Dimpled the leading edge skin and both top skins, and got everything ready to prime. Primed all the right wing skins, deburred the main ribs, riveted the leading edge together and almost finished installing the Duck Works landing/taxi light into the leading edge. Finished the Duck Works light installation and countersunk all the little holes in the spar where the skin dimples sit. Also rivted the leading edge skin to the spar. Finished installing the leading edge to the right wing by riveting the ribs to the spar (it took until tonight because I waited for John to give me a hand). Installed the fuel tank on the wing as well. Riveted the top skins on. I didn't back rivet these and they seemed to turn out better. I had trouble keeping the rivets straight with the backrivetter. I also took the wing out of the jig! Now I can take down these two posts.
Attached the aileron hinges and aileron gap seal to the left wing, started on the flap brace. Finished installing both sets of aileron hinges, aileron gap seals and flap braces.
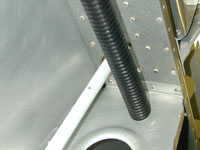
Installed the aileron belcrank in the right wing. Installed the nylon corrugated wiring conduit in the wings.
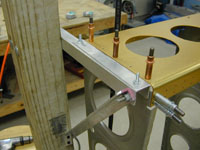
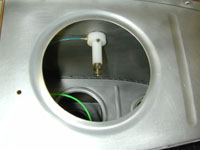
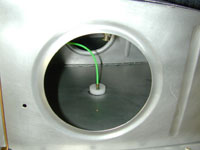
Made a pitot tube out of some thin walled stainless tubing from work and started laying out the placement for it on the wing. Installed the Pitot tube in the left wing and changed the little washers out that go between the bushing halves of the flap center bushing. I also ran the flap motor back and forth several times to make sure that my safety wire installation wouldn't get in a bind.
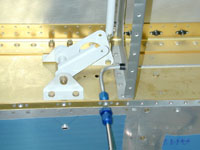
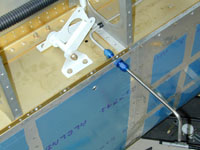
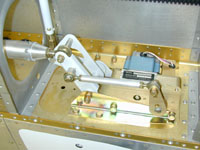
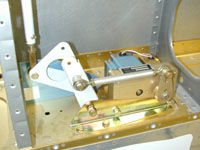
Mounted the Tru Trak autopilot servo in the right wing. Finished mounting the autopilot servo in the right wing.
Finished all the little spacers for all of the aileron push tubes. Installed the AOA Sport probes in the right wing, and put a right angle fitting on the pitot tubing where it exits the wing.
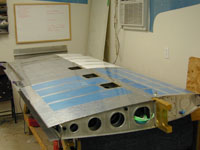
Pressure tested the AOA ports, did a little rewiring on the position lights in the wing tip. Deburred and dimpled the bottom wing skins and prepared them for priming. Primed the wing skins, cleaned up the shop a bit. Removed the ailerons from the wings and set the right wing on the table getting ready to install the bottom skins. Aligned and drilled the flap hinge to the right wing. Started riveting the bottom skins to the right wing. More riveting of the bottom skins. More riveting of the bottom wing skins. Still riveting the bottom skins on the right wing. Finished riveting the bottom skin on the right wing. Moved the left wing over to the bench and drilled the flap hinge to the flap brace.
Finished drilling and countersinking the flap hinge brace and finished preparing the bottom skins for riveting onto the left wing. Started riveting the bottom skins on the left wing. A few more rivets go in the bottom of the left wing More rivets into the left bottom skins Finished riveting the wing skins. The wings are now ready to go on the fuse. Also turned the fuselage around in the garage and rearranged things so that I'll have room to attach the wings. Started getting the tail ready to mount. I installed all the nutplates on the wings for the inspection covers and the fuselage fairing.
|