| Ailerons Log |
|
|
| ||||||
|
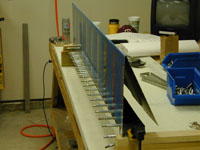
Home Project News February 3, 2021 Project Log Empennage Horizontal Stabilizer Vertical Stabilizer Rudder Elevators Rudder II Wing Kit Wings Fuel Tanks Ailerons Flaps Fuselage Kit Bulkheads Aft Section Foreward Section Top Fuselage Cabin Finish Canopy Cowling Electrical Firewall Forward Fuel System Engine Baffles Misc Miscellaneous Fiberglass Assembly Panel Finishing Up! FAQ Project Notes Project Summary Guestbook Other Stuff | The ailerons are similar in construction to the elevators and rudder. There is a main spar with inboard and outboard ribs with stiffeners attached to the skin. The Aileron is different in that it has a pre-formed leading edge that contains a piece of galvanized pipe for a counter balance. Started the ailerons by knocking off the edges of all the ribs and stiffeners. Got the old door out and drilled all the stiffeners to the skins and started deburring the stiffeners.
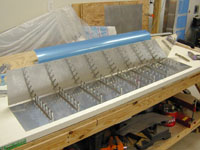
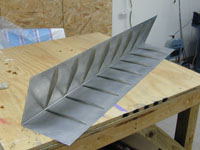
Finished deburring and dimpling the aileron stiffeners. Started getting all the aileron parts ready to prime. Got the rest of the aileron parts deburred, dimpled and ready to prime. Primed all the aileron parts. Backriveted the stiffeners to the aileron skins, formed the trailing edge bend and started assembling the skeletons.
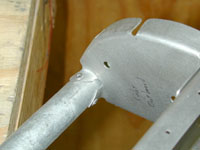
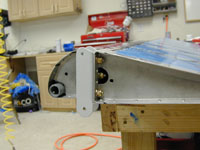
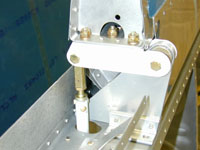
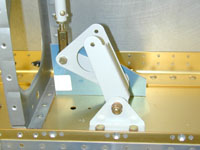
I took down the emp/wing jig and cleaned up a little. Worked on the forward aileron skeletons some more. Drilled the ribs and spars of the right aileron, drilled and countersunk the counterbalance pipe, dimpled and countersunk all the holes and assembled the aileron. Also bolted on the hinge brackets.
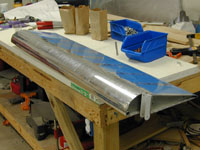
Installed the right aileron on the wing and started drilling out the reinforcement plates on the left aileron. Finished putting the reinforcement plates on the aileron spar, riveted the leading egde ribs to the spar and riveted the counterbalance pipe to the ribs.
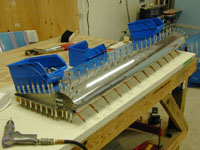
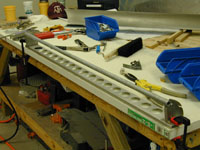
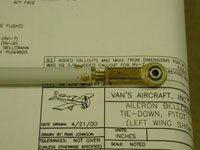
Finished Drilling all the holes in the left aileron and started deburring, dimpling and countersinking everything. Finished deburring and countersinking all the parts for the left aileron, and finished riveting it together. Mounted the left aileron to the wing. Cut, primed and assembled both aileron control rods. Installed and adjusted the control rods to the ailerons.
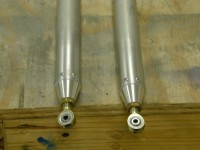
Cut, cleaned and etched the aileron push tubes. Primed the inside of the aileron push tubes with the DuPont two part epoxy primer. Riveted the aileron push tube together.
|