| Assembly Log |
|
|
| ||||||
|
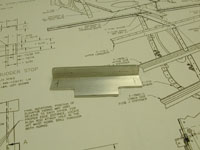
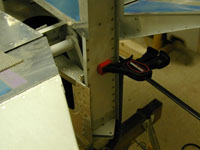
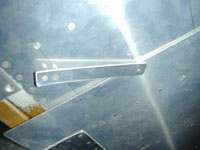
Home Project News February 3, 2021 Project Log Empennage Horizontal Stabilizer Vertical Stabilizer Rudder Elevators Rudder II Wing Kit Wings Fuel Tanks Ailerons Flaps Fuselage Kit Bulkheads Aft Section Foreward Section Top Fuselage Cabin Finish Canopy Cowling Electrical Firewall Forward Fuel System Engine Baffles Misc Miscellaneous Fiberglass Assembly Panel Finishing Up! FAQ Project Notes Project Summary Guestbook Other Stuff | Fabricated the up elevator stop and the two little spacers that go under the HS forward spar. Clamped the Horizontal Stabilizer onto the fuselage and measured it all.
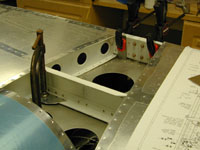
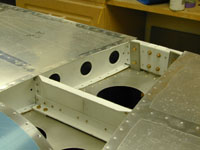
Finished installing the HS and started getting the VS clamped and lined up.
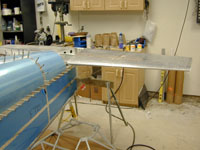
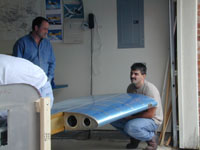
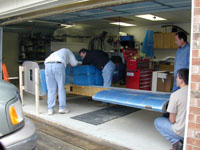
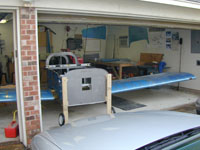
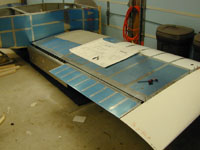
Cleaned up a little bit and rearranged the garage for installing the wings. Vern, Steve and John all came over and we managed to get the wings installed. Thanks a million guys.
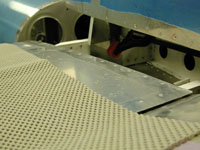
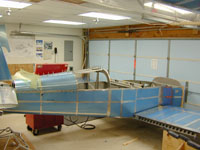
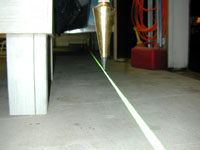
Checked the alignment of the wings and discovered that I have too much forward sweep. The wings are going to have to come back off so I can trim the rear spar a little more. Worked on aligning and drilling the VS to the fuselage. Shannon and Kelly came out to give me a hand with the wings and we managed to get them off and and after a little trimming they went back on and lined up just right.
Measured the sweep, incidence angle and angle from the fuse again. Mounted the flaps to make sure that they would close properly, then took them off. Then I took a long break, came back out to the garage measured everything again, stood back and scratched my head, and then once I had measured everything one more time, I finally got up the nerve to drill a 1/8" hole through the rear spar attach point. Whew a whole day and two holes.
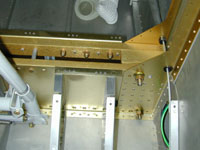
Measured the wings again, and then started enlarging the holes in the rear spar attach. Finally got them out to 5/16" and started breathing again. Then I drilled the holes where the bottom fuselage skin overlaps and will be screwed to the wing once that was done I started working on the fuel tank attach brackets.
Had some trouble getting the left fuel tank bracket stuff riveted together. Finally got it all drilled and ready to bolt on and primed the steel parts, I'll finish it tomorrow. Finished the fuel tank attach brackets and drilled the hole in the tank bracket. Attached the ailerons to the wings and set the pushrod lengths. Also mounted the flaps to the wings.
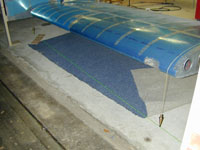
I didn't like one of the original flap push rods that I made so I made another one. I set the right flap pushrod length and cut the funny looking hole in the bottom of the fuselage for the pushrod to move through. Finished the flap pushrods.
Fit and drilled the wing root fairings. It is nice to do something easy and simple for a change.
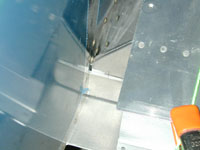
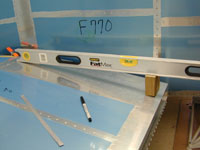
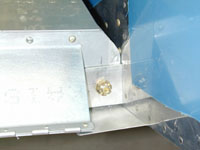
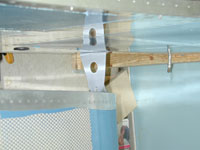
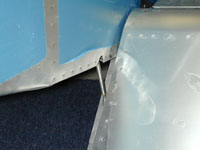
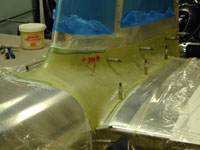
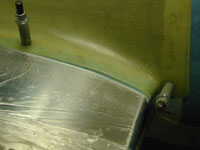
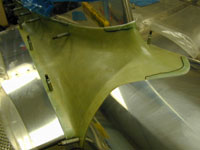
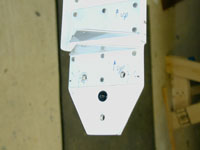
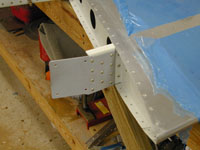
Measured and measured and measured the lower attach points for the VS and finally drilled one of the holes. I got nervous about the bolt callout and decided to call Van's tommorrow and ask before I continue, so I finished up by building a little stand to hold the fuselage up while I install the engine mount for good. Took the wings off and rearranged things to get ready to finish the tail installation, the fuselage and canopy. Drilled the VS attach plate (number two) to the HS forward spar. It shouldn't have taken two hours but I had already messed one up and I didn't want to mess up another one. I also got the VS aligned and a couple of the holes drilled that hold it to the attach plate. Finished drilling all the holes that attach the vertical stabilizer, and started working on the empennage fairing. Worked on the lower emp fairing. F-794A. After I tried trimming it so that the rubber channel would fit I decided that I would rather not use the rubber channel. It is just too dificult to get it to fit well. So I'll do the other side by just cutting the aluminum piece to fit close. Spent all day on the !@#?% emp fairing. I am much happier with the 'close fit' method for the lower fairing as opposed to the rubber channel. I think I'll reorder the piece for the other side and do it the same way. The fiberglass piece is a real pain and I still don't have it fitting right. Vern came over and helped me with my painting technique. Now the inside of the cabin looks much better. He also helped me figure out how to fill the gaps in the emp fairing. Worked on the emp fairing a little more. Smeared some SuperFil on the emp fairing to fill the gaps.
Put some more Super-Fil on the emp fairing and re-fit it to the tail. This should be the last time. Finished drilling the top forward skin holes out and started fitting the panel. Sanded the Super Fil on the emp fairing and took off the rest of the Saran wrap. It fit's pretty good.
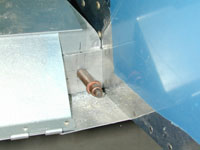
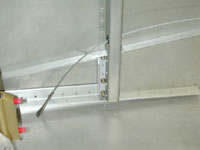
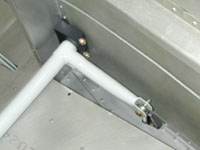
Drilled a couple of holes for the strobe / position light wires to pass through the aft two bulkheads and the VS spar. I called Van's before I drilled the hole and they said that it would be okay as long as I drilled the hole close to the bottom hinge bracket. I also removed the VS and the HS from the airplane. I was going to need to do that anyway and I am really starting to need the room.
Primed the little spacers and attach pieces of the tail assembly, and riveted the VS attach plate to the VS spar.
|