June, 2001 June 1, 2001 - 2 hours
Finished riveting the rudder skin to the skelton. Formed the leading edge of the rudder. Rudder is finished, except for fiberglass and the counterweight.
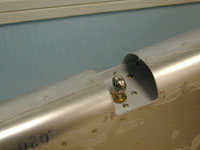
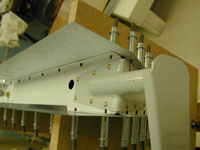
Detail of the rudder leading edge and one of the rod end bearings that serve to attach the rudder to the vertical stabilizer.
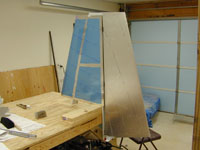
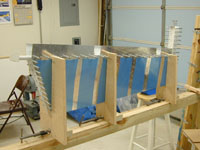
Finished rudder attached to the vertical stabilizer. The funny looking coating is the contact paper that I put on to protect it.
June 3, 2001 - 3.5 hours
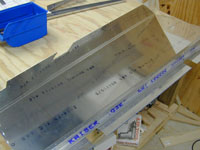
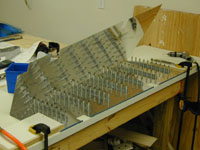
Started laying out the stiffeners on the right elevator and cut the stiffeners from the angle provided.
Laying out where the stiffeners will attach to the right elevator. The pre-punched rudder stiffeners were much more fun.
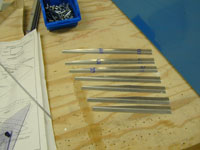
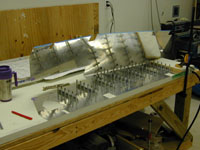
Elevator stiffeners waiting for me to figure out where to drill the holes.
June 4, 2001 - 1.75 hours
Drilled pilot holes in the stiffeners for the bottom right elevator skin and started fabricating the stiffeners for the top.
June 5, 2001 - 1.5 hours
Drilled the second set of stiffeners for the right elevator. Started deburring all of the right elevator pieces.
June 7, 2001 - 2 hours
Deburring right elevator parts.
June 9, 2001 - 4.5 hours
Drilled the stiffeners to the right elevator skin. Finished deburring all right elevator parts. Sanded, cleaned, coated and primed all the parts to the right elevator.
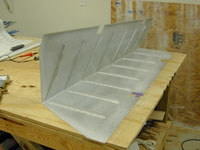
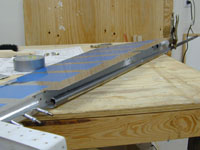
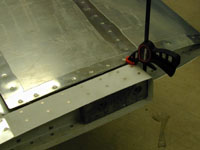
Stiffeners drilled and clecoed to the right elevator skin. I used a hollow core door as a table hoping that it would be straighter than the table that I used for the Rudder.
June 10, 2001 - 6 hours
Riveted the stiffeners to the right elevator skin. Formed the trailing edge of the right elevator. Started putting the elevator skeleton together and built the V-Block jig for the elevators.
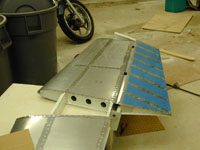
Stiffeners are back riveted to the right elevator.
Reinforcment plates and platenuts are riveted to the right elevator spar.
June 18, 2001 - 2 hours
Straightened up the V-block jig. I wasn't happy with it. Riveted the tip ribs together. Looked dumbfounded at the manual and the prints for a while until I realized that I was too tired to continue and went to bed.
June 22, 2001 - 2 hours
Finished laying out the Right Elevator skeleton. Started drilling and dimpling holes to attach skin to skeleton.
June 23, 2001 - 6.5 hours
Finished drilling, deburring and dimpling holes. Riveted the right elevator together. Bent the leading edge and mounted to the HS. Drilled the pilot hole for the HS hinge. Right elevator is finished except for fiber glass and bolting on the counter weights.
Close up of how I used a pop rivet dimple die set and a couple pair of Vise Grips to dimple those wicked little holes at the trailing edge of the elevators.
The elevator mounted in the V-block jig.
Close up of the horn attachment. Notice the line that I used to help align it with the centerline of the spar.
I hate this part. Forming the leading edge of the elevator with a piece of 1/2" black pipe.
Right elevator mounted to the horizontal stabilizer.
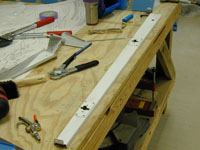
I used a small quick-clamp to hold the elevator in trail.
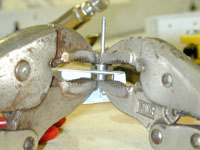
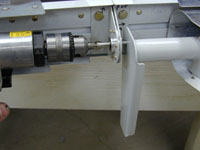
Detail showing how I used a small piece of 1/4" stainless tubing as a drill guide bushing to drill the pilot hole of the control horn. Notice that I had to cut notches in the HS spar lower flange so the control horn could move forward.
June 24, 2001 - 9 hours
Started the left elevator. Fabricated and drilled all of the stiffeners. Trimmed the Z brackets for the electric trim servo mount and started deburring all of the parts in preparation for priming.
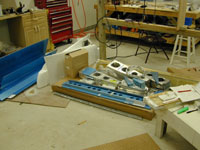
The stiffeners drilled and clecoed to my holow core door. These stiffeners are not the same as on the right elevator. They are not even located the same. Make sure you look at the plans twice.
June 25, 2001 - 2.5 hours
Deburring, Deburring, Deburring.
June 26, 2001 - 3.5 hours
Received the wing kit today. Shannon and I inventoried all the parts and I stored them away.
Hard to believe that this is going to turn into two wings. This is going to be fun!!!