| Project Log - January, 2003 |
|
|
| ||||||
|
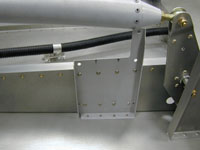
Home Project News February 3, 2021 Project Log Empennage Horizontal Stabilizer Vertical Stabilizer Rudder Elevators Rudder II Wing Kit Wings Fuel Tanks Ailerons Flaps Fuselage Kit Bulkheads Aft Section Foreward Section Top Fuselage Cabin Finish Canopy Cowling Electrical Firewall Forward Fuel System Engine Baffles Misc Miscellaneous Fiberglass Assembly Panel Finishing Up! FAQ Project Notes Project Summary Guestbook Other Stuff | Deburred and dimpled the bottom wing skins and prepared them for priming. Primed the wing skins, cleaned up the shop a bit. Removed the ailerons from the wings and set the right wing on the table getting ready to install the bottom skins. Installed the mount for the Tru-Trak pitch servo. I'm not buying the servo just yet but Tru-Trak gave me the mount so that I could put it in while it was still fairly easy to get to.
Did a pretty major cleanup of the garage, and drilled the holes for the engine mount.
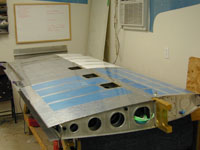
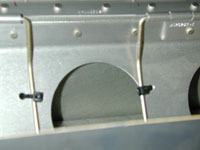
Aligned and drilled the flap hinge to the right wing. Started riveting the bottom skins to the right wing. More riveting of the bottom skins. More riveting of the bottom wing skins. Still riveting the bottom skins on the right wing. Finished riveting the bottom skin on the right wing. Moved the left wing over to the bench and drilled the flap hinge to the flap brace.
Finished drilling and countersinking the flap hinge brace and finished preparing the bottom skins for riveting onto the left wing. Started riveting the bottom skins on the left wing. A few more rivets go in the bottom of the left wing |