| Project Log - April, 2004 |
|
|
| ||||||
|
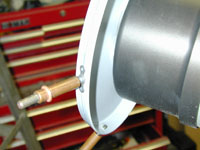
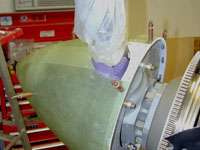
Home Project News February 3, 2021 Project Log Empennage Horizontal Stabilizer Vertical Stabilizer Rudder Elevators Rudder II Wing Kit Wings Fuel Tanks Ailerons Flaps Fuselage Kit Bulkheads Aft Section Foreward Section Top Fuselage Cabin Finish Canopy Cowling Electrical Firewall Forward Fuel System Engine Baffles Misc Miscellaneous Fiberglass Assembly Panel Finishing Up! FAQ Project Notes Project Summary Guestbook Other Stuff | More work on the spinner. Made the gap covers for the spinner and finished up all the drilling and riveting of the nutplates on the spinner. There are 22 screws holding that thing on. That is a lot of holes. The spinner is finished except for paint.
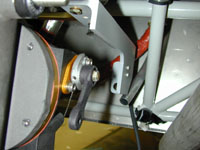
Removed the prop and stored it away. I will probably wait until the airplane is at the hangar to put it back on. I had to go back and fix something that I missed on the baffle. The rear left part of the baffle needs to have an added piece of angle reinforcement when using the baffle mount oil cooler like I am. This was pointed out to me by a couple of guys through email. BTW thanks guys for the notes and if anybody else sees something in these pictures that could be a problem, please don't think that I will be offended if you point them out to me. That is part of the reason that I have this website.
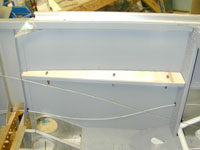
Cut out the wood for the arm rests. I couldn't find the thickness that I wanted so I cut two pieces of 1/16" model airplane plywood and then sandwiched a piece of fiberglass between them with epoxy resin. Finished the armrest upholstry backing. I drilled three holes through each of them to the armrests. Then I riveted nutplates to them so that I can attach them after the foam and upholstry are on.
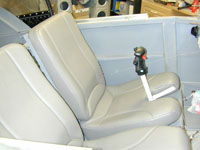
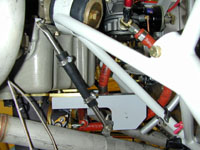
I still needed to safety wire the bottom of the new baffle piece on so I did that. Shannon took the arm rest backs to the upholstry shop and they were through with the seats. So I reinstalled the seat backs and tried out the new seat cushions.
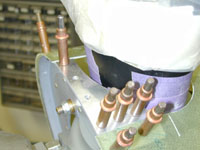
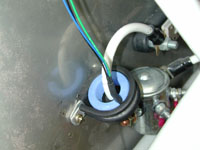
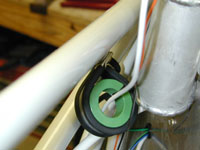
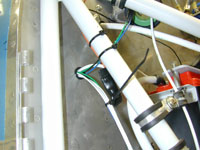
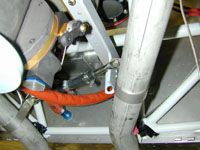
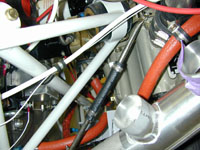
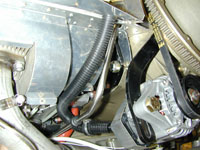
Worked on mounting the Hall Effect current sensors and re mounted the capacitor for the SD-8 alternator. Replaced my 10 slot main buss fuse block with a 20 slot version. 10 was going to work but it was going to leave me with no spares, so I now have a 20 slot fuse block for both the e-buss and the main buss. I finished mounting the the current sensors. Cut a hole and installed a snap bushing for the wires to go through the firewall on the right side of the plane. I piddled around with some of the smaller wires on the contactors. I also worked on the control cable brackets.
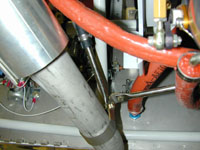
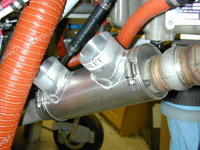
Still cutting square holes in the panel. I also got the spots laid out for the round holes so that I can borrow that instrument hole punch from Marshall. Drilled the holes for the switches. Finished and remounted the control cable mounts. Installed the exhaust mounts, and while I was at it I put the cabin heat muff on. I had forgotten about the cabin heat muff and had an interference issue that I had to work out. Those exhaust mounts were far more difficult that I thought they would be and I advise everybody to do it earlier in the process than I did.
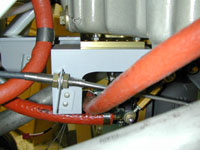
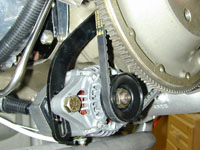
I had to cut the adjustment arm down on the alternator. This is the long arm with the curved slot in it that allows you to adjust the belt tension. It was too long and with the correct belt installed I couldn't get the bolt in, so I drilled another hole in it on the end that mounts to the engine and cut the old hole off. I went ahead and mounted the alternator and then spent some time tidying up some of the wires on the engine. I also started working on the alternator blast tube.
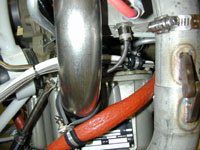
Finished the alternator blast tube.
|