| Project Log - July, 2004 |
|
|
| ||||||
|
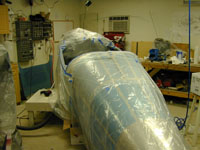
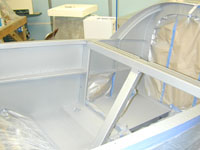
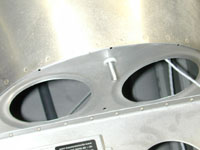
Home Project News February 3, 2021 Project Log Empennage Horizontal Stabilizer Vertical Stabilizer Rudder Elevators Rudder II Wing Kit Wings Fuel Tanks Ailerons Flaps Fuselage Kit Bulkheads Aft Section Foreward Section Top Fuselage Cabin Finish Canopy Cowling Electrical Firewall Forward Fuel System Engine Baffles Misc Miscellaneous Fiberglass Assembly Panel Finishing Up! FAQ Project Notes Project Summary Guestbook Other Stuff | Vacuumed out the cabin and started masking stuff off. Finished masking off the airplane and covering up all the things in the shop that I did not want to get painted. I cleaned everything and sprayed the primer and paint on the cabin. It turned out pretty good. I wouldn't be too happy with that kind of finish on the outside of the plane but for the cabin it will be okay.
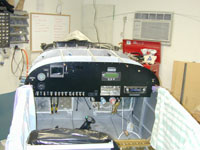
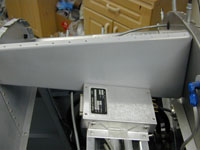
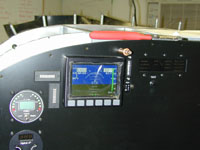
I took the panel into my mad scientist lab and tried to get everything wired that I could on the bench before taking it outside to mount in the plane. I decided that I wasn't going to be able to get all the wire bundles to look like I want without having the panel in the airplane, so I moved all the tools and the panel out of the mad scientist lab and into the airplane factory. I mounted the panel in the plane with clecos.
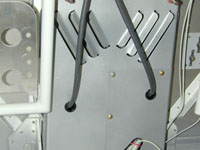
I spent a little time today finishing up a few details that I wanted to get done and couldn't until the panel was in. I made the new throttle and mixture cable brackets. The old ones were made from 062 angle and I wasn't sure they'd stand up to the vibration. I replaced them with 0.125 angle. I also fixed the cabin heat muff. It was loose on the exhaust after tightening the hose clamps all the way. Then I mounted the throttle/prop/mixture/purge controls under the instruent panel and ran the cables through the firewall. I wanted to have those installed before getting too carried away on wiring. Wires are easy to route around control cables but control cables aren't so easy to route around wires.
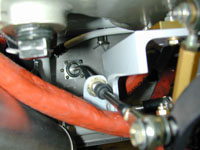
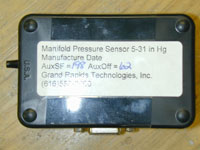
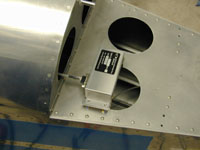
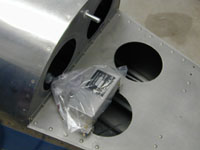
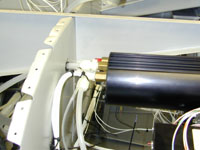
Finished up the control cable support bracket that attaches the control cables to the sub panel. Started running wires. I had to punch a few holes and I think I spent more time scratching my head trying to figure out where the wires are going to go than I did running wires. Spent most of the evening soldering really small wires to the back of the intercom. I have to leave to go offshore later today so I decided to piddle around with the plane some. I mounted the GRT manifold pressure transducer to the sub-panel and finally got around to installing the bulkhead fitting and the hose to the manifold pressure port on the engine. I tubed up the line to both the manifold pressure sensor and the Lightspeed electronic ignition. I cut some more holes in the firewall for the electronic ignition cables as well as some other wires.
Connected the Mixture, Governor and Purge control cables to the AFP and prop governor. Reinstalled the fuel tank vents (hopefully this will be the last time). I also started scratching my head trying to figure out the best way to get the cabin heat control cable through the firewall without interfering with too much stuff. The jury is still out. Started working on mounting the magnetic sensor for the Dynon D-10. Finished mounting the Mag sensor and pulled all the wire to wire it up. Also finished all the power wiring to the Dynon. Finished wiring up the Lightspeed Electronic ignition and the strobe power supply stuff as well.
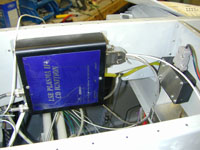
Mounted the brain box for the Proprietary Software Systems AOA indicator. Glued some more of those little stick on wire holders to different places on the panel.
Wired up the master contactor to the switch and turned it on. After checking that all the right voltages were going to all the right busses I checked the pins on the connector for the Dynon and then put a fuse in and turned it on.
Wired up the Aux feed to the essential buss. This is the switch that feeds the e-buss if the master buss is down. I also piddleed around with that cabin heat cable again. Today I built a bracket and hooked up the parking brake cable. I started wiring the AOA indicator. I also hooked up the static an pitot lines to the AOA and the Dynon. While I was in the back of the plane I pulled the rudder cables back through the cabin again.
|