| Project Log - September, 2004 |
|
|
| ||||||
|
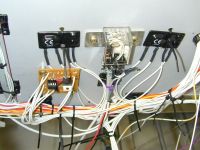
Home Project News February 3, 2021 Project Log Empennage Horizontal Stabilizer Vertical Stabilizer Rudder Elevators Rudder II Wing Kit Wings Fuel Tanks Ailerons Flaps Fuselage Kit Bulkheads Aft Section Foreward Section Top Fuselage Cabin Finish Canopy Cowling Electrical Firewall Forward Fuel System Engine Baffles Misc Miscellaneous Fiberglass Assembly Panel Finishing Up! FAQ Project Notes Project Summary Guestbook Other Stuff | I replaced the Push-on/Push-off switches in my stick grip with momentary switches. I wired up the com flip-flop and memory buttons to the stick grip and started assembling the co-pilot stick grip that I bought from Ray Allen Company. I messed around with the little solid state flasher that I have been toying with for the last few weeks. I make a little circuit board with a microcontroller on it to drive a couple of solid state relays to flash the landing / taxi lights. I'm not real happy with the solid state flasher that I bought from B & C that clicks. Where I come from solid state stuff shouldn't click. So I made my own. It's a little bit of overkill to have a microcontroller on it but it gave me some more programming experience and it keeps the part count low on the board. Finished installing the little solid state lamp flasher that I made. It works pretty well. It's ugly as it can be but it works. I also managed to get power run to my autopilot and turned it on to see if it would work. It did.
I couldn't bring myself to do any wiring today so I piddled around 'under the hood' I reset my mixture cable according to info that I got from AFP. I don't quite have enough travel to move the mixture arm. I am talking just a little bit too short like 1/32". I had it where I got ICO but not full rich. AFP said do the opposite since I'll be killing the engine with the purge valve. I also installed the fuel pump drain line.
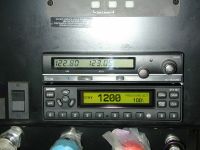
I spent most of the day installing the transponder. The Encoder wires were already installed but I put the antenna in and hooked it up and wired power and dimmer control wires to it as well as tightening up the mounting screws. It's good to see it work. I am also trying to share the GPS signal from the GPS-35 that the Tru-Trak autopilot uses so that I can get the automatic ALT / STBY functionality from the GTX-327. We'll see if that works. I had to take the panel trim switches apart and re-wire them so that they would work with my trim set-up and I installed the rear mounting screws for the comm radio. I had left them off because they were a pain and I didn't know whether I would need to take that tray out while messing with the transponder.
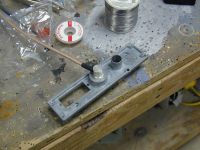
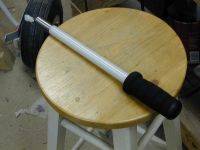
Didn't feel like doing much on the project tonight, but I did remember to borrow the little 4-40 tap from work so I went ahead and put the stick grip on the right stick.
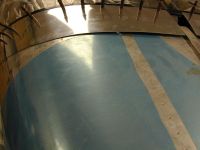
Hooked up the starter circuit and Main alternator circuit. Today I decided to change gears a little bit and go back to work on the canopy. I had decided that I was going to do the aft skirts in fiberglass but I didn't feel like getting the epoxy out today so I put the first skirts that I made on and I've about decided that I may be able to make them work. It seems that I had the canopy too far back when I did the initial fitting so I may be able to trim them down and get them to fit. I'll work on it for a few nights and if it doesn't go my way then I'll go back to the fiberglass idea.
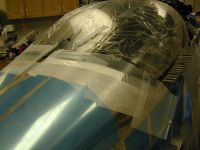
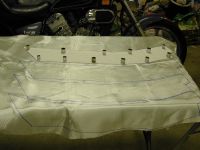
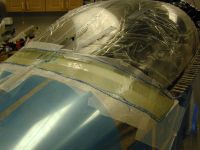
Trimmed on the aft skirt of the canopy. I think it may work out. Still more trimming on the aft canopy skirts. It's looking like it will fit okay but I sure am taking a lot of material off of those skirts. I think it'll look okay when it's all said and done. Decided that the aft skirts weren't going to work after all. I simply have them too tight and the canopy isn't going to close until I trim the completely away. So today I started laying up fiberglass skirts. We'll see how that turns out.
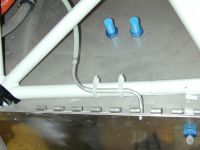
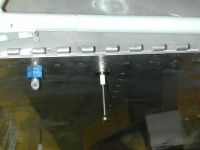
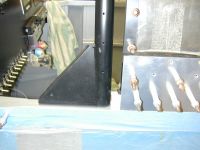
I smeared some Super-Fil on the canopy skirs to help fill the low spot caused by the gap betweent the canopy and the fuselage. Ran the cabin heat cable through the firewall and hooked it up. I also started putting those stainless firewall penetration sheilds around the grommets where the cabin heat cable and the purge valve cable come through the firewall. |