December, 2001 December 2, 2001 - 5 hours
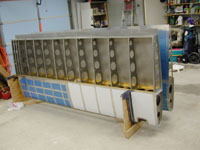
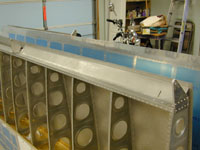
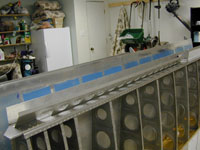
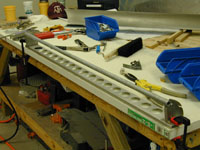
Riveted the top skins on. I didn't back rivet these and they seemed to turn out better. I had trouble keeping the rivets straight with the backrivetter. I also took the wing out of the jig! Now I can take down these two posts.
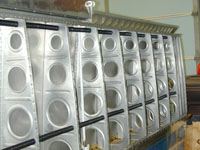
Two wings out of the jig and into the craddle!
December 2, 2001 - 4.5 hours
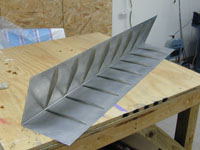
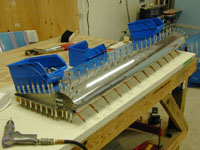
Primed all the aileron parts. Backriveted the stiffeners to the aileron skins, formed the trailing edge bend and started assembling the skeletons.
Stiffeners riveted to an aileron skin.
December 3, 2001 - 2.2 hours
I took down the emp/wing jig and cleaned up a little. Worked on the forward aileron skeletons some more.
December 6, 2001 - 2.2 hours
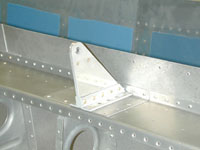
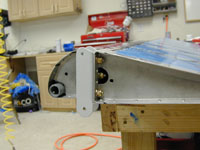
Attached the aileron hinges and aileron gap seal to the left wing, started on the flap brace.
December 8, 2001 - 4 hours
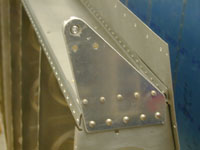
Finished installing both sets of aileron hinges, aileron gap seals and flap braces.
Outboard aileron hinge of the right wing.
Another view of the outboard aileron hinge.
Inboard aileron hinge
Aileron gap seal installed on the right wing.
Flap brace riveted to the rear spar of the right wing.
December 9, 2001 - 1 hours
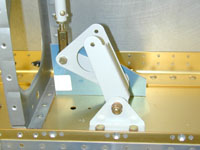
Installed the aileron belcrank in the right wing.
December 9, 2001 - 6 hours
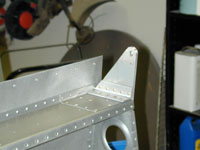
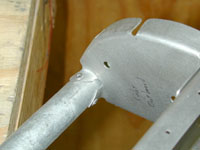
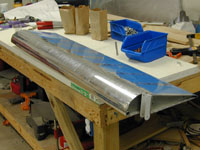
Drilled the ribs and spars of the right aileron, drilled and countersunk the counterbalance pipe, dimpled and countersunk all the holes and assembled the aileron. Also bolted on the hinge brackets.
Close up of the aileron counterbalance pipe riveted to one of the leading edge ribs.
Aileron spar, rib and counterbalance assembly.
Once all the clecoes are in I had to build up under the aileron to hold it straight while I finished drilling.
Riveting the top of the aileron was much easier once I clamped the spar down to some blocks to hold it steady.
Inboard side of the aileron. Notice the hole that had to be cut in the rib to access the nut that bolts the hinge bracket on.
Right aileron finished.
December 10, 2001 - 2 hours
Installed the right aileron on the wing and started drilling out the reinforcement plates on the left aileron.
December 11, 2001 - 1.5 hours
Finished putting the reinforcement plates on the aileron spar, riveted the leading egde ribs to the spar and riveted the counterbalance pipe to the ribs.
I clamped the aileron to the table as I drilled and riveted the counterbalance pipe to the ribs to help keep it from twisting.
December 12, 2001 - 2.1 hours
Finished Drilling all the holes in the left aileron and started deburring, dimpling and countersinking everything.
December 15, 2001 - 4.5 hours
Finished deburring and countersinking all the parts for the left aileron, and finished riveting it together.
December 16, 2001 - 2.5 hours
Mounted the left aileron to the wing. Cut, primed and assembled both aileron control rods. Installed and adjusted the control rods to the ailerons.
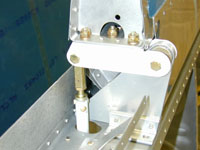
Close up of the Rod End assembly of the aileron push rod.
Completed aileron push rod.
Detail of the inboard hinge/push rod connection.
This shows the bellcrank and the push rod assembly with the bellcrank jig (the blue thing). The jig holds the bellcrank in the neutral position while the length of the push rod is set.
December 16, 2001 - 1 hours
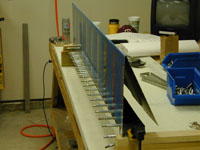
Installed the nylon corrugated wiring conduit in the wings.
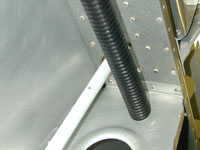
Both wiring conduits installed in the left wing. I put two in to separate RF signals from lighting signals.
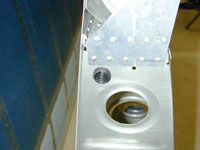
This shows what the conduit look like protruding through the outboard rib.
I simply enlarged the aft tooling holes to locate the wiring conduit. It's hard to tell from this photo but there is about an inch of clearance between the conduit and the push rod.
December 17, 2001 - 1.3 hours
Cleaned up a little, got all the Flap parts out of storage and started fabricating the little reinforcement brackets.
December 18, 2001 - 1.5 hours
Finished fabricating the reinforcement bracket and started deburring all the edges of the flap parts.
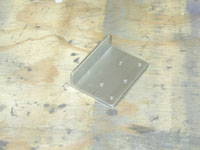
This is the reinfocement bracket that rivets to the front of the flap spar on the inboard side.
December 19, 2001 - 1.5 hours
More deburring of flap parts
December 30, 2001 - 1.4 hours
Deburred the edges of the flap skins