| Project Log - May, 2003 |
|
|
| ||||||
|
Home Project News February 3, 2021 Project Log Empennage Horizontal Stabilizer Vertical Stabilizer Rudder Elevators Rudder II Wing Kit Wings Fuel Tanks Ailerons Flaps Fuselage Kit Bulkheads Aft Section Foreward Section Top Fuselage Cabin Finish Canopy Cowling Electrical Firewall Forward Fuel System Engine Baffles Misc Miscellaneous Fiberglass Assembly Panel Finishing Up! FAQ Project Notes Project Summary Guestbook Other Stuff | Put some more Super-Fil on the emp fairing and re-fit it to the tail. This should be the last time. Drilled some of the forward top skin holes. Reattached the elevators and the rudder, fabricated and installed the rudder stops.
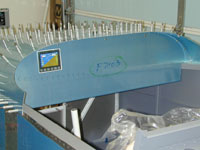
Finished drilling the top forward skin holes out and started fitting the panel. Sanded the Super Fil on the emp fairing and took off the rest of the Saran wrap. It fit's pretty good.
Finished fitting the panel into the forward fuselage, drilled the little angles that go around the forward canopy deck to fasten the panel and started fitting the eye-ball vents to the bottom of the panel. Finished the eyebal vents. Did some last minute adjustments on the Rudder Pedals. They seemed to stick more than I would like so I spent some time fine tuning them.
Finally finished fabricating all the parts for the top forward fuselage. Finished drilling all the holes and took it all apart, deburred, dimpled and countersunk all the holes and just nearly got it all ready to prime.
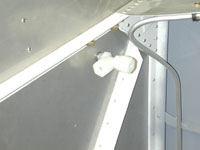
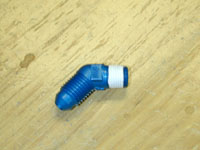
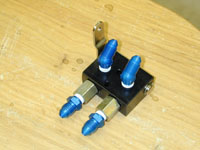
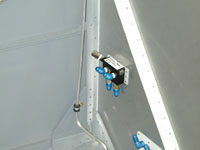
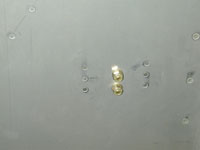
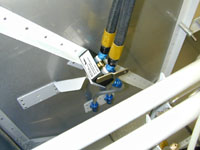
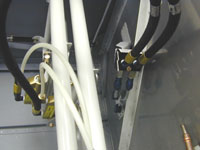
Deburred all the holes in the fuselage where the top forward structure will go. Re-installed (hopefully for the last time) the fuel vent lines. Played around with rudder pedal location until I was comfortable. Installed the brake fluid reservoir. Built and installed a doubler plate for the parking brake valve. Installed all the fittings into the brake master cylinders.
Tubed up the parking brake valve to the firewall bulkhead fittings. Re-installed the rudder pedals (hopefully for the last time). Fabricated the little plates that attach the rudder pedals to the rudder cables, and started tubing up the brakes.
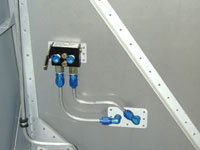
Moved the parking brake valve to the new location, and tubed it up.
Retubed the parking brake valve. I didn't like the way the flares came out the first time and was afraid it wouldn't seal. It's much easier to fix it now than to crawl under the panel later so I decided to play it safe. I also went ahead and tightened up on all the plastic/brass fittings on the brake system.
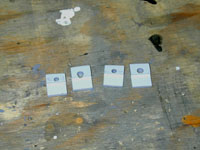
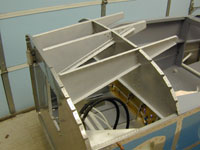
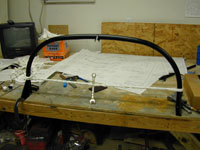
Pilot drilled the aft decks for the roll bar attach bolts. Trimmed and primed the little spacer blocks that go under the aft deck and started trying to bend the roll bar to the right width. Cleaned and primed all the parts of the forward fuselage structure.
Riveted all the structure together for the forward fuselage.
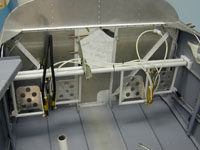
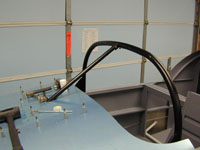
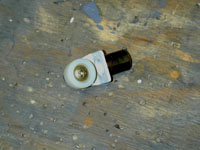
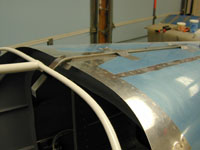
Finished bending the roll bar, clamped and drilled the roll bar to the forward fuselage. Spent way too much time putting the little spacers and nuts up under the aft decks, and bolted the roll bar to the fuselage. I had to make a couple of shims to get it perpendicular to the fuse. Then I cut and fit the roll bar brace and drilled the holes to bolt it to the fuselage and the roll bar. I cut the slider rails to length and drilled the little nylon guide that goes on the back of the canopy frame. Started building the canopy guide track, but I didn't get very far.
Finished building the slider track and taped the track to the fuselage. I started trying to figure out how to fit the slider frame to the fuselage. This is going to be a patience testing exercise.
Today I worked on bending the canopy frame. Cussed a little, bent a little, cussed some more, unbent a little, measured, cussed, bent, cussed..... |